Steps for make a drone show
You have decided to make a drone show. Awesome! You need a drone show software.
Step 1: Prepare the drone choregraphy
Start with preparing the drone choreography animation using any 3d animation software. Believe it or not, there are no limits for animation.
Drones can create virtually any figure in three dimensions they can even carry fireworks or smoke generators on board.
So simply unlock your fantasy animation. Let’s see how to create a drone show choreography.
You need a studio with extensive experience with traditional 3d animation and the turn shows is this fresh new medium where they can apply our experience in the skills.
Think of it as comparing drawn animation to pixel arts the idea is to deliver a story and emotion to the audience with a limited number of pixels.
The rules that apply to traditional animation in general also apply to drone photography. One major difference is that the drone animation is meant to be seen from any direction while in film you compose the frame just for one user.
Step 2: Watchout for collisions
Of course there are additional conditions that have to be considered when animating the show which are not present in our everyday workflow such as speed and distance between each drone. It’s very interesting set of new challenges we’re learning to overcome.
Drone 3D animation is rather a new field that means that there are no best practices or tutorials out there in Internet and every trick or approach you come up with is an innovation.
When it comes to speed and distance they are tested once the animation is created to make sure there’s no collision risk and drones can reach the required speed if necessary changes can be made right.
Step 3: Run a virtual test with a drone show software
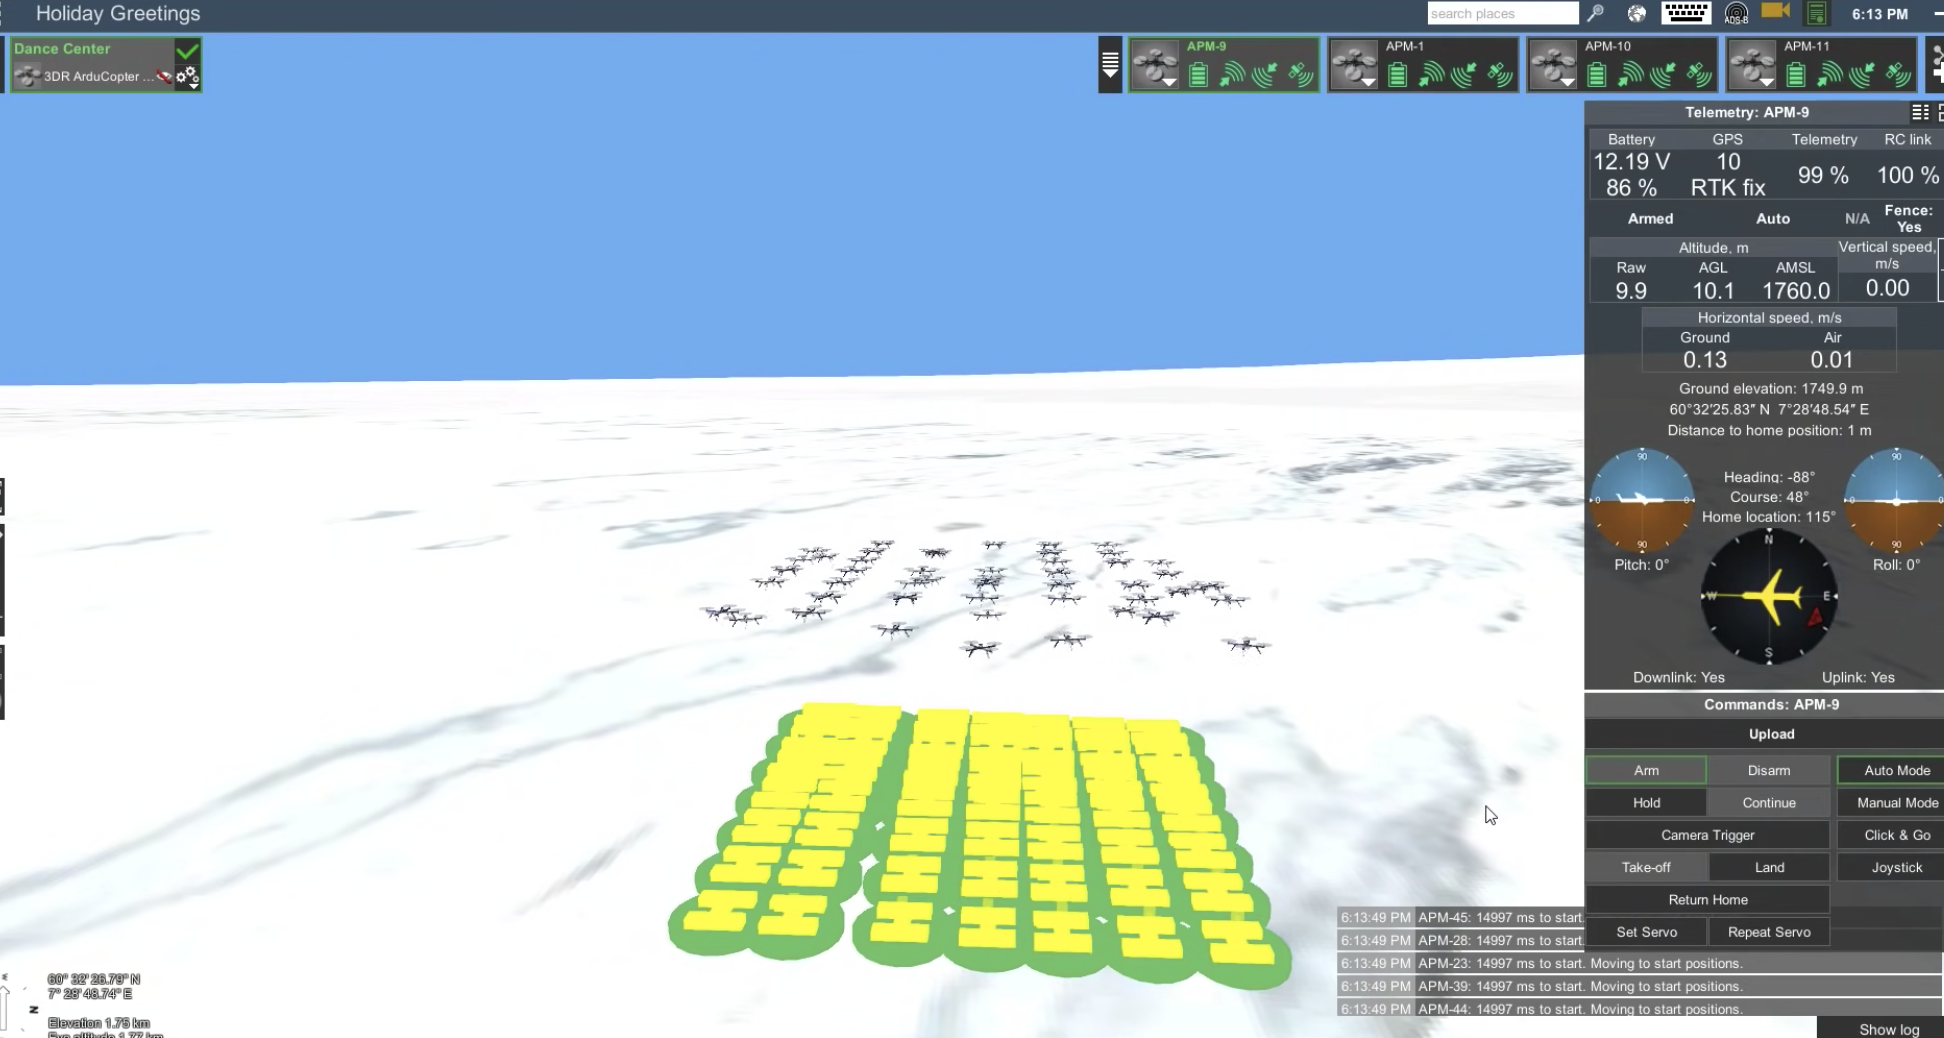
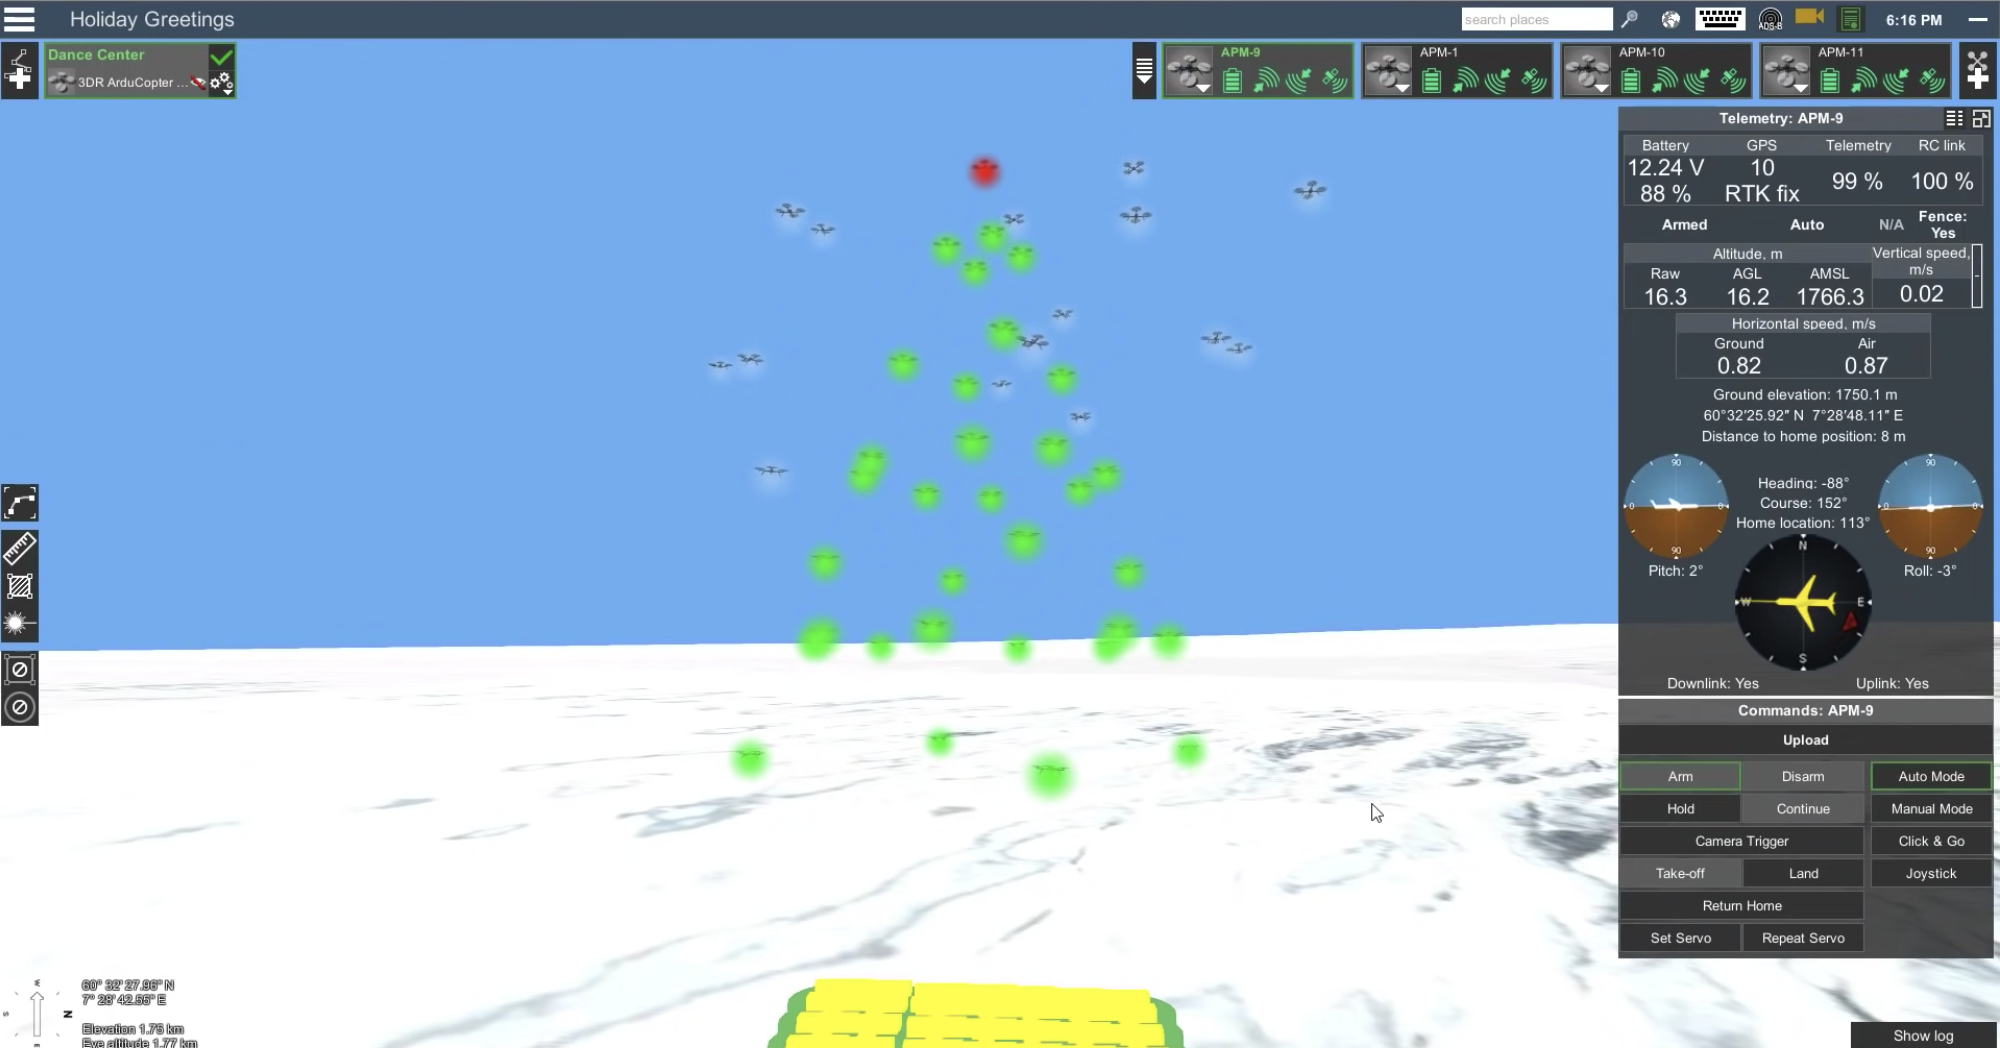
Now once the animation is created you can use drone show software to run a virtual test without damaging drones. We use a drone show software in the loop virtual environment simulating real-life drone behavior.
This helps check if the projected takeoff and landing positions of drones are okay. All formations are as planned lights work and the show faces the proper direction.
Step 4: Protect spectators from drones collision
When the projected show position is clear you can ensure spectator’s safety by limiting drone flying zones using a cylinder or polygon fence.
Controlling dozens or even hundreds of drones is not an easy task at all. As a drone show software helps with the hardest part the show operator has to setups of drones where’s the button under control.
Step 5: Define the show location and take off field
The next step is logistics defining where and when the show will be set. The field must be large enough to accommodate all the drones ready for takeoff.
Once you arrive at the location the excitement starts to build. Keep cool, important preparations start now!
Step 6: Drone position and field preparation
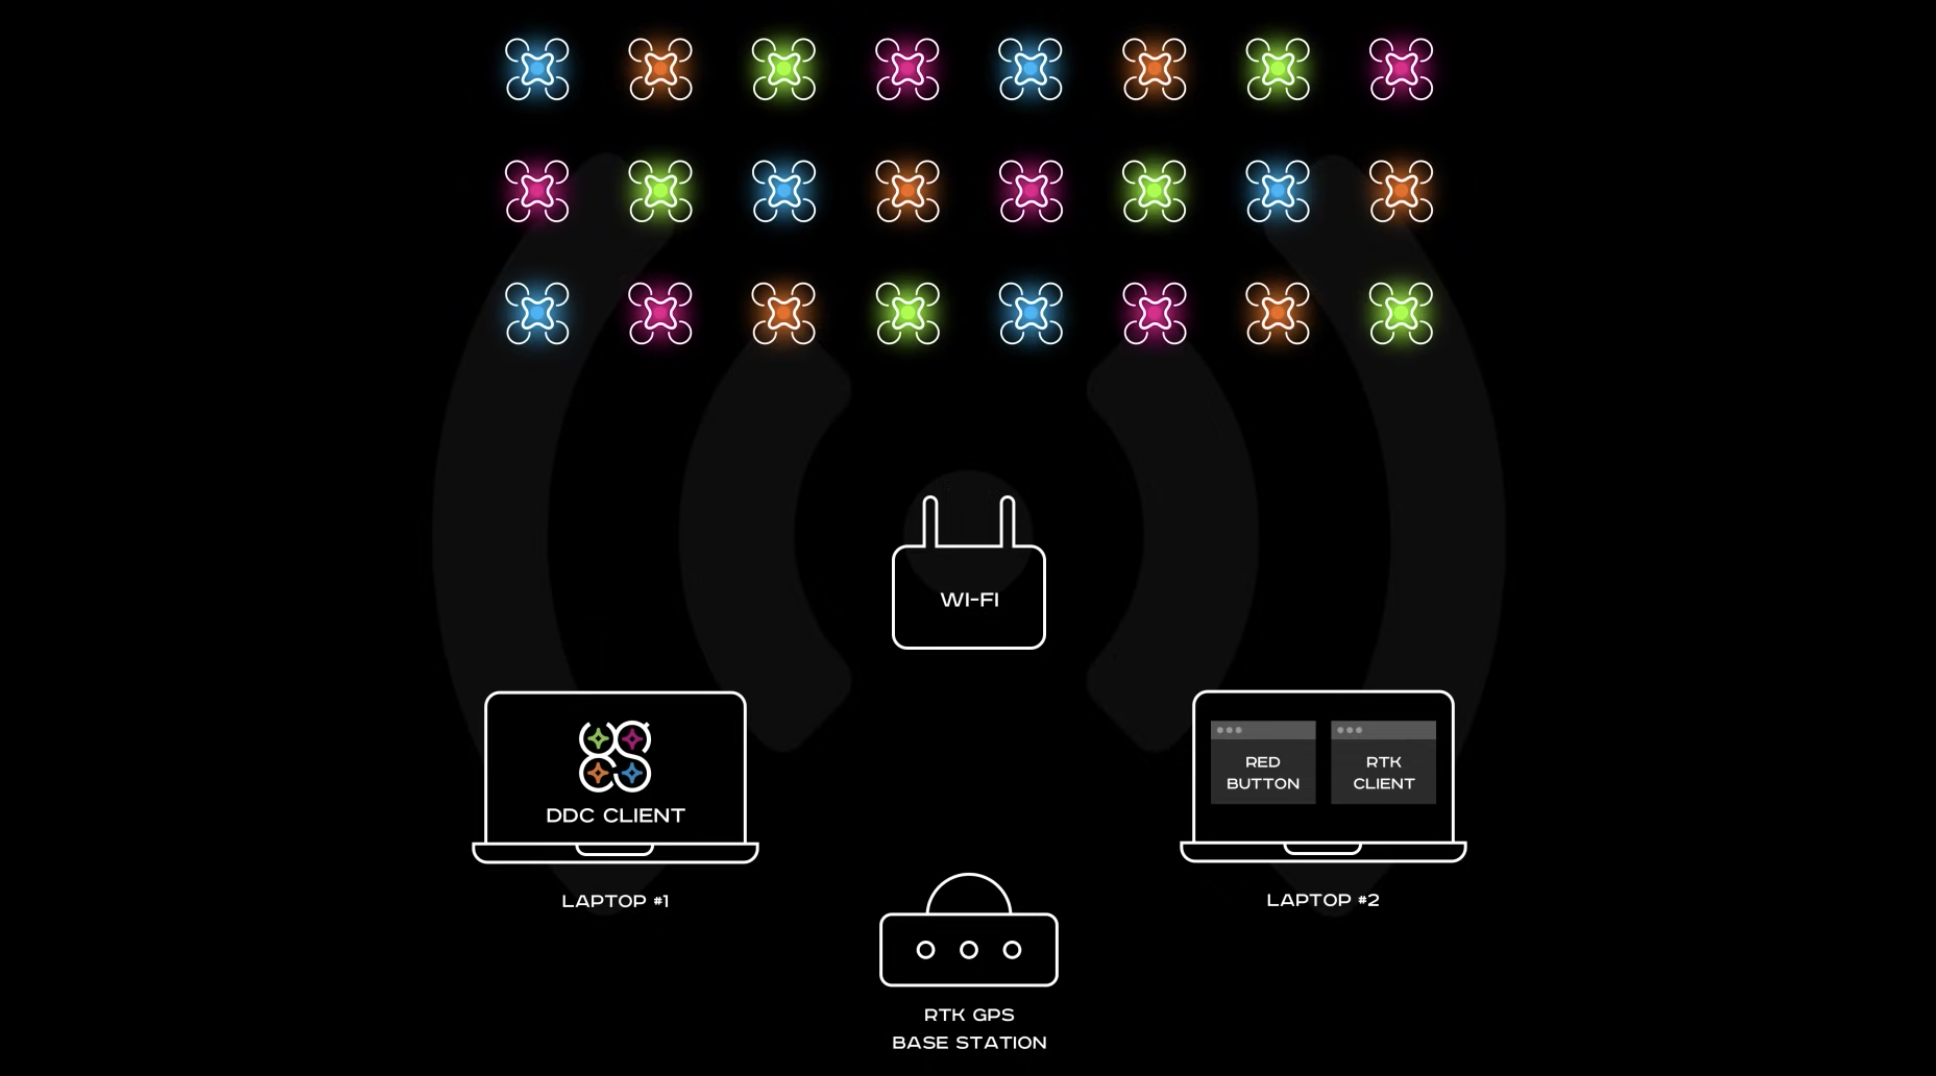
This includes setting up the real time kinematic GPS base station Wi-Fi router, for connecting to drones in the main control laptop.
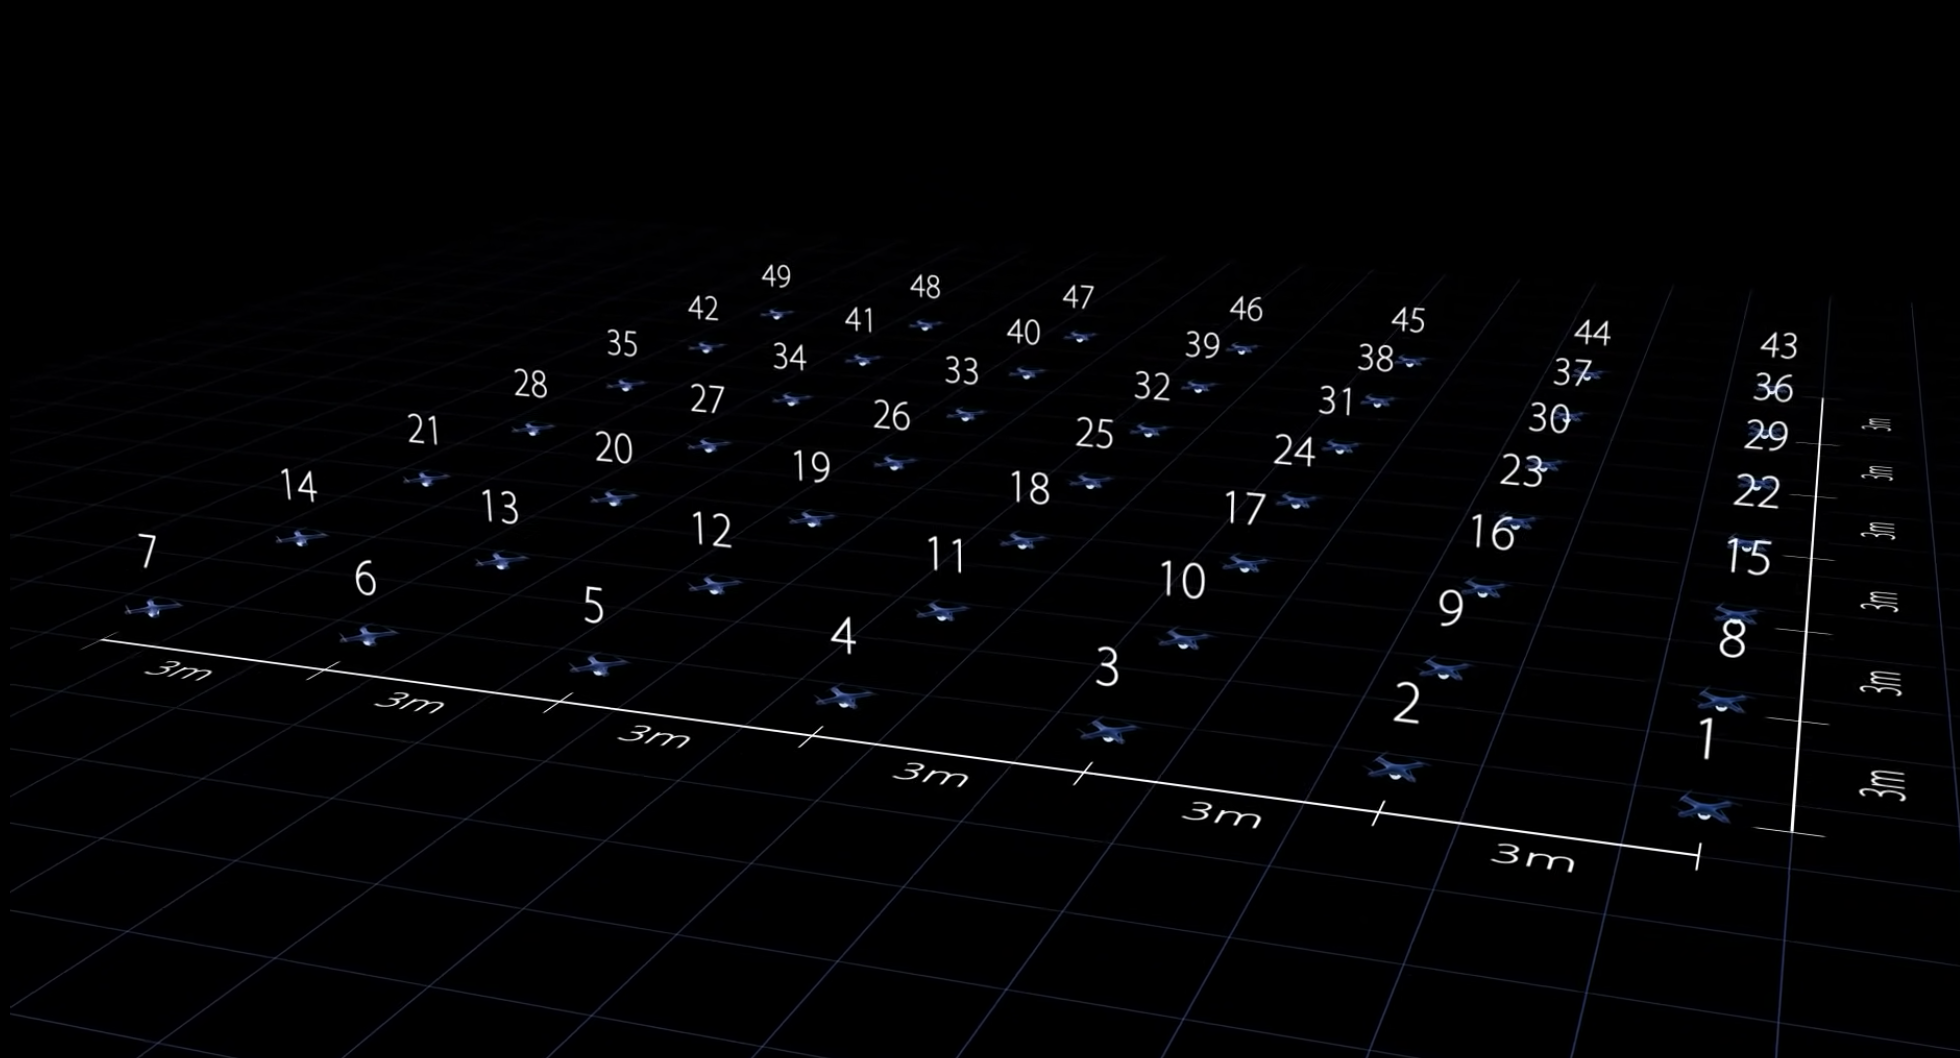
When everything is ready, put the drones in their respective positions the distance between drones on the ground is usually between two and a half to three meters.
This means if you’re planning to use 49 drones you need a 324 square metre field to position them.
Remember that you also need to have a safety fence around the field.
The surface must be flat enough without tall grass or deep snow if no such area is available you can use a platform for takeoff. But in this case, you must be extremely careful when landing the drones.
After the drones are properly positioned drones show software automatically assigns the flight paths from the animation to each drone.
Step 7: Upload each drone’s path to it and do a pre-flight check
Next the path for each is uploaded to the drones.
It’s time to do a pre-flight check to make sure all parameters are within the acceptable limits.
Final step (8): the show time
The final step is to set the show time and let the drones know when to take off. The drone show software allows you to pre program an exact starting time for all drones.
So you don’t need to worry about being late with the show.
Ready Steady arm the motors and go!
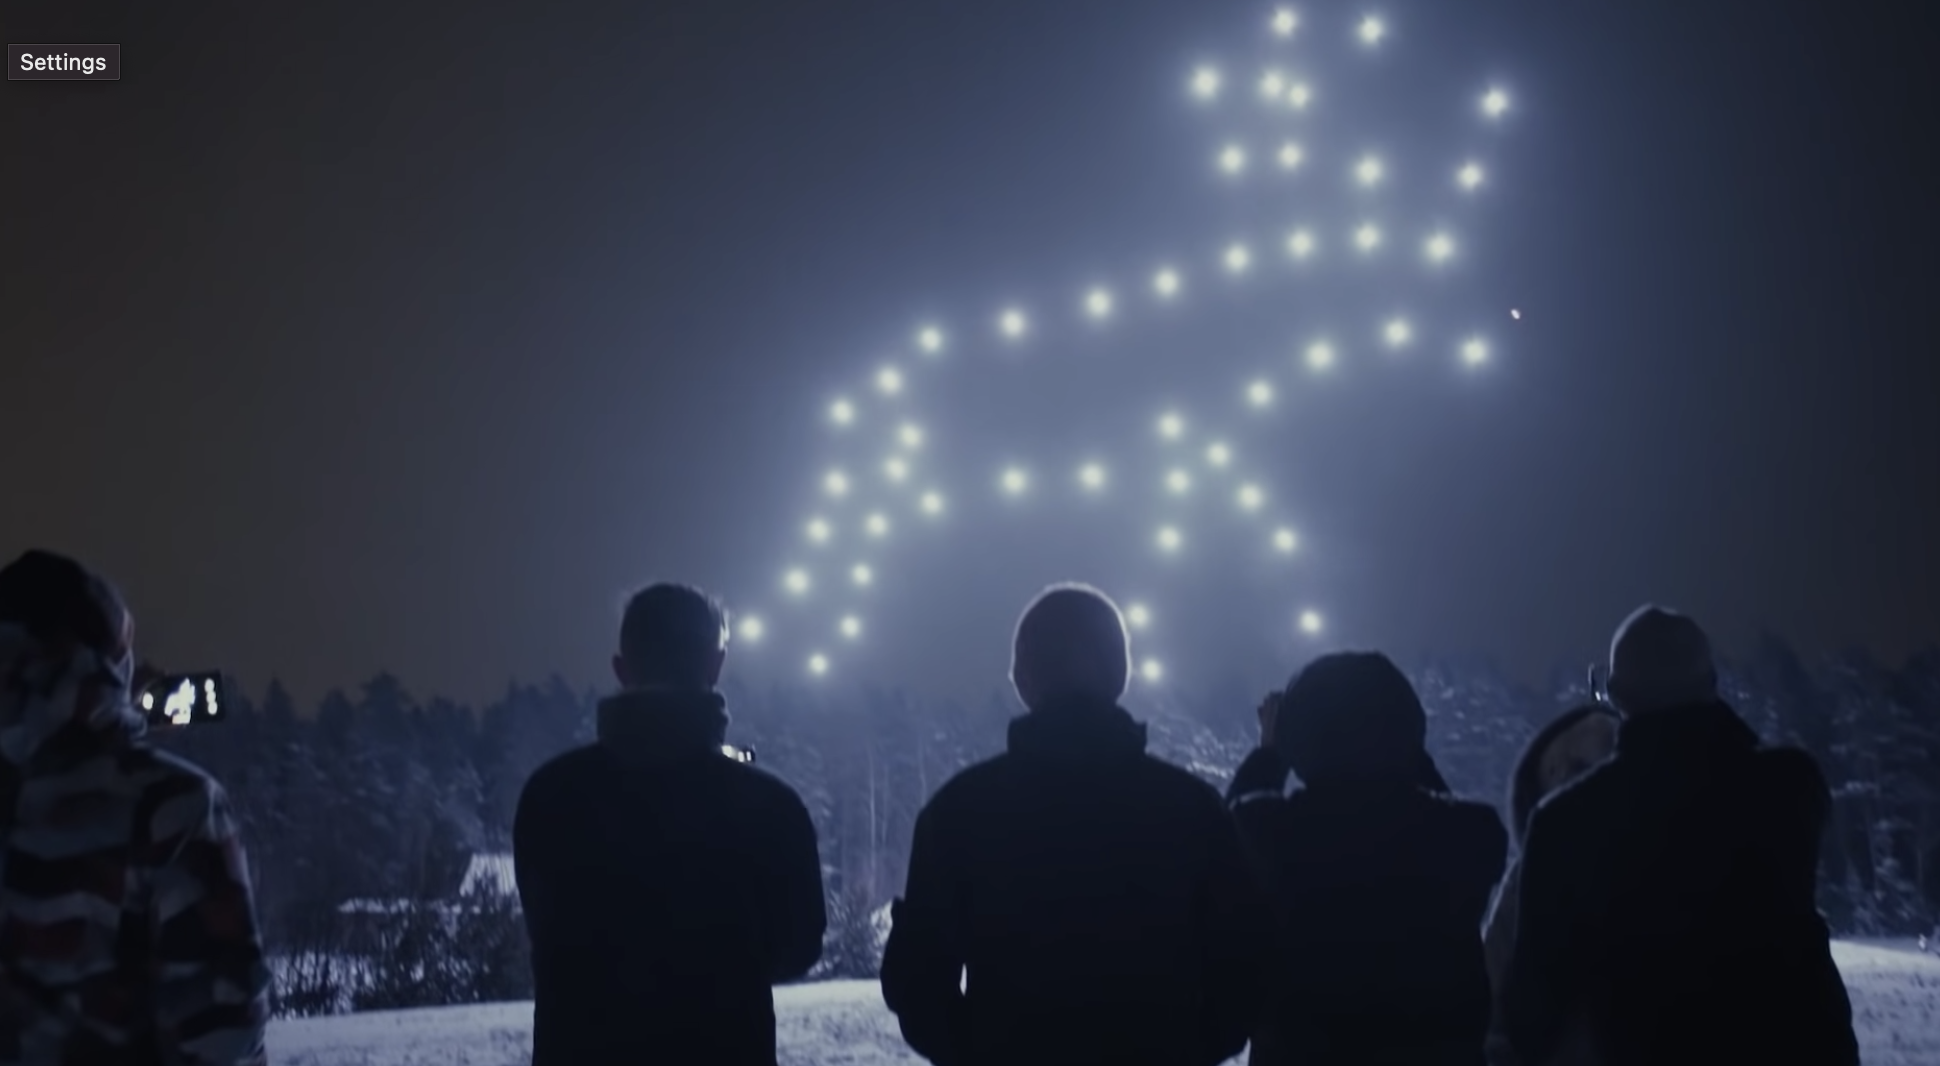
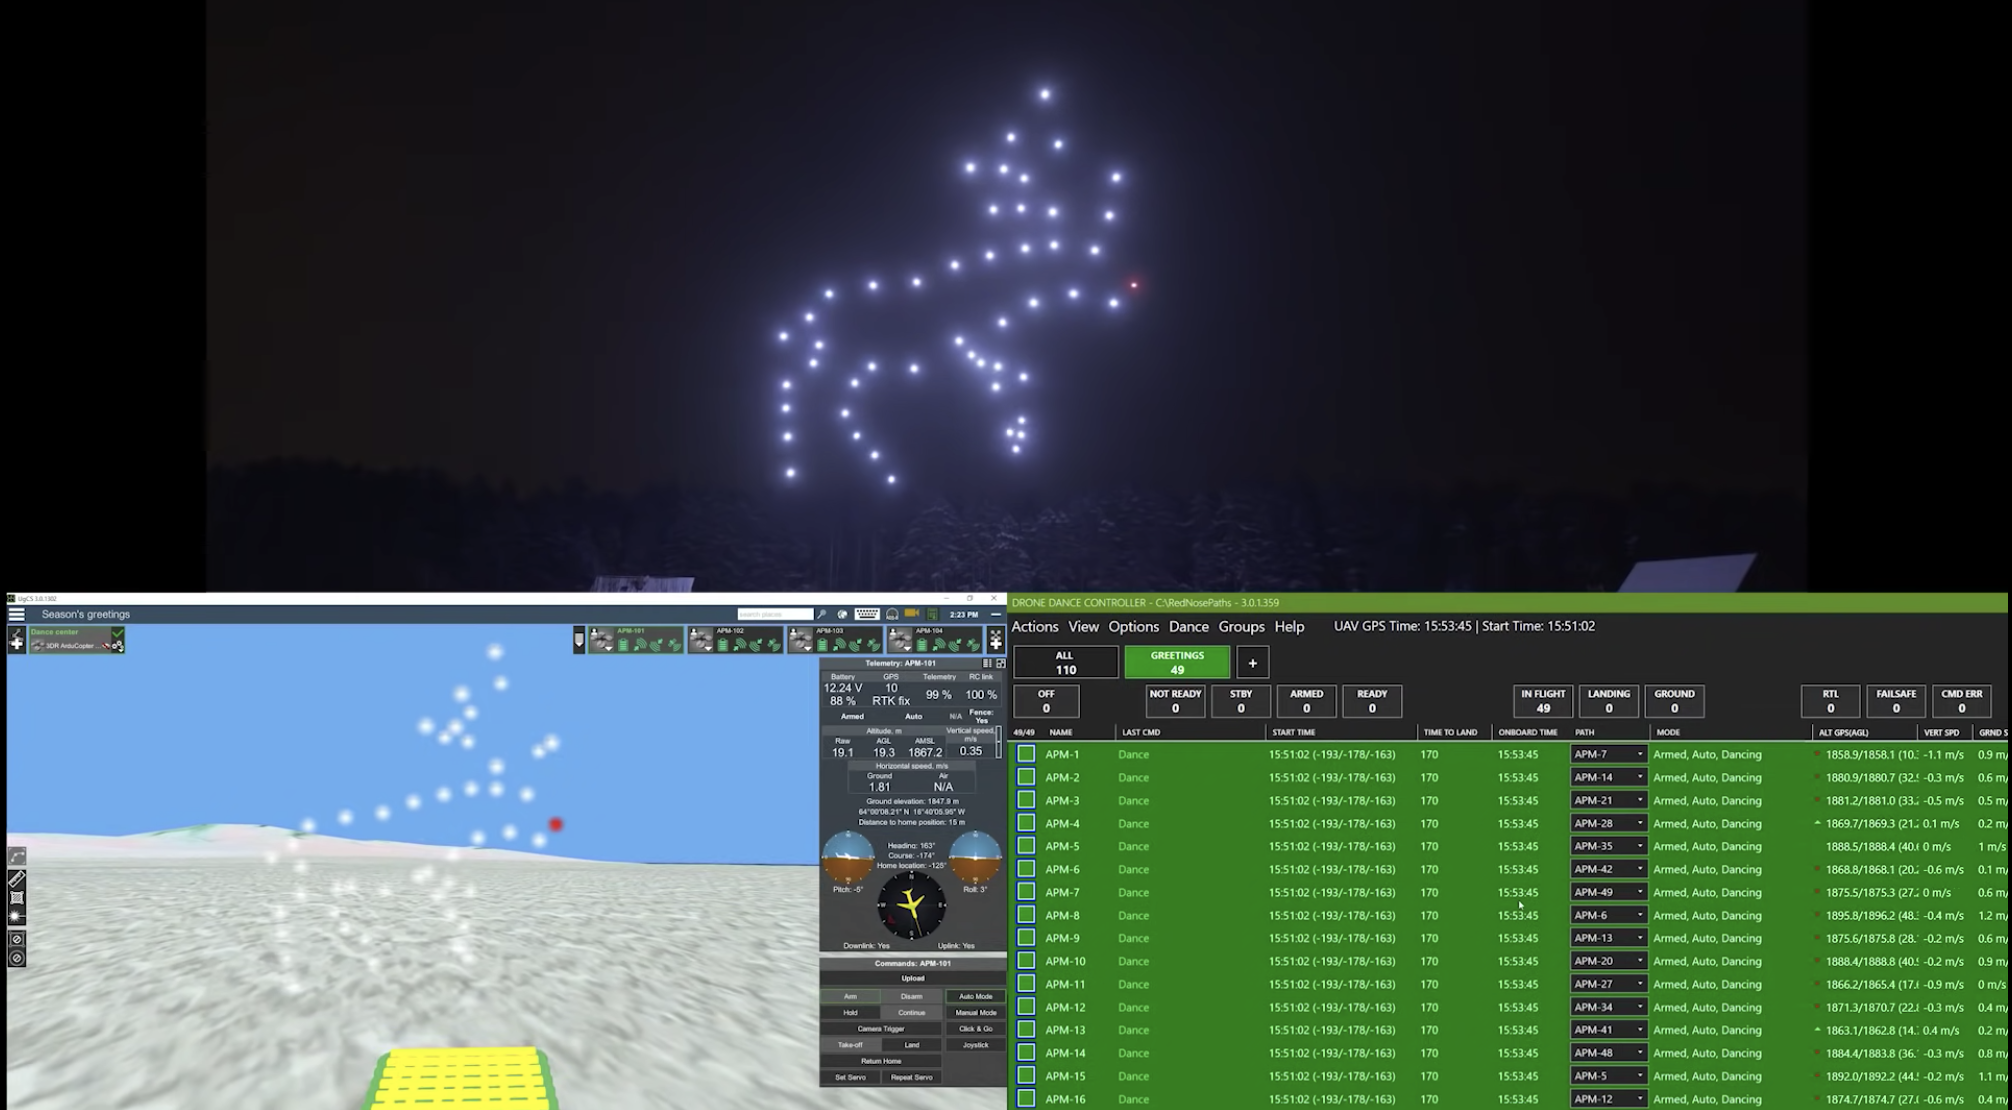
During the show, if you’re the drone operator, you have to watch your screen instead of a beautiful action in the sky.
The drone show software displays all drone parameters in real time and all drone flight on a 3d map. The drone show software will take care of the most important part safety. If something unexpected happens for example a strong wind gust there are four safety layers to protect spectators.
Additional step (9): Safety layers
Prevent drones from going beyond a perimeter
First is a geofence which automatically prevents drones from going beyond a certain perimeter.
Take direct control of a defective drone
The second is the control interface enabling the operator to land each drone at any time.
A red button to stop the show
The third is a completely independent red button app that uses a separate computer and radio channel to stop the show and land all drones.
A human pilot to control an individual drone
Finally, the fourth layer is a backup human pilot with a remote controller who could even take control of an individual drone and land it.
Conclusion
The drone software plays an important role in the drone show. The drones will land automatically after the show so just relax and enjoy the show!